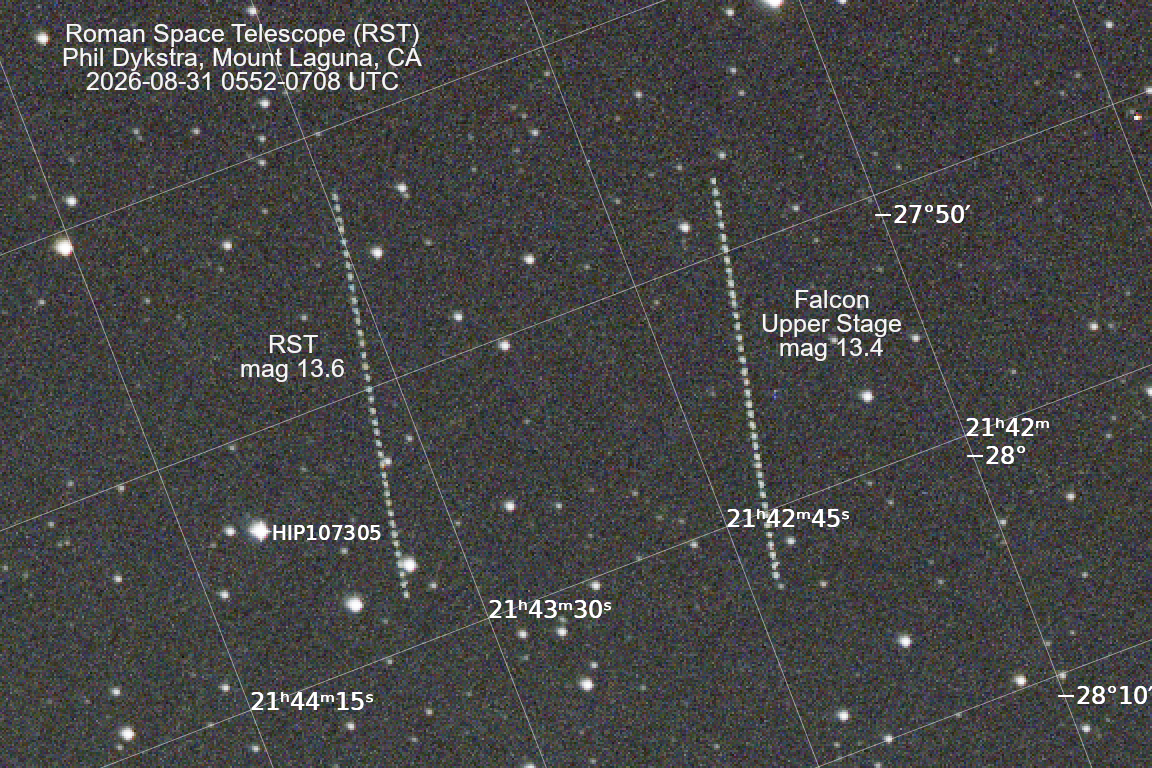
It was an unexpected bonus to find the upper stage of the Falcon Heavy traveling along near the Roman Space Telescope (RST). The lines above are not quite parallel, but diverge slightly as they move up. This is in spite of them flying mostly away from us which would make parallel lines appear to converge, so you are seeing the separation between the two bodies increase. JPL Horizons was not tracking the rocket body when I checked so I don't know what the distance was to the rocket nor how far apart the objects were from each other. During this one hour window the rocket body magnitude (13.4) was slightly brighter than that of the RST (13.6). Magnitude estimates were made with ASTAP.
On January 1st of 2022, I attempted to image the James Webb Space Telescope (JWST) on its way to the L2 point. I failed to find it in my images, which has haunted me ever since. So when the Roman Space Telescope (RST) was launched, I jumped at the chance to try again. RST launched 2026-Aug-30 11:26:04 UTC on a Falcon Heavy from Kennedy Space Center (LC-39A) in Florida. Payload separation occurred about 31 minutes after launch, and the six solar panels were deployed about an hour after that. RST will take roughly 30 days to reach the L2 point nearly 1M miles away from the earth. I had no idea how bright RST would be, but I knew it would get dimmer with each passing night. The weather cooperated so I went to my favorite observing site at Mount Laguna, CA on the first night after launch.
I knew where to look thanks to the Horizons system at JPL.
*************************************************************************************************************************************************************
 Date__(UT)__HR:MN     R.A._____(ICRF)_____DEC  Azi____(a-app)___Elev             delta      deldot  Sky_motion  Sky_mot_PA  RelVel-ANG  Lun_Sky_Brt  sky_SNR
*************************************************************************************************************************************************************
$$SOE
 2026-Aug-31 03:00 N   21 42 59.43 -28 19 53.3  130.873011   7.653626  0.00108415336258   1.7189968   12.294520   66.928258   84.645386         n.a.     n.a.
 2026-Aug-31 04:00  m  21 43 35.47 -28 14 14.6  140.839653  16.449667  0.00112554652190   1.7248257   8.1857431   36.432421   86.305604        1.856    0.000
 2026-Aug-31 05:00  m  21 43 45.38 -28 06 42.6  152.781037  23.473628  0.00116749501222   1.7513962   8.7557318   2.6493420   85.964338        2.042    0.000
 2026-Aug-31 06:00  m  21 43 41.03 -27 56 48.3  166.667022  28.032523  0.00121011235187   1.7924595   11.250795   349.61836   84.754160        2.136    0.000
 2026-Aug-31 07:00  m  21 43 30.12 -27 44 35.8  181.812644  29.515157  0.00125383864052   1.8424933   13.546777   349.22241   83.641495        2.179    0.000
 2026-Aug-31 08:00  m  21 43 20.93 -27 30 16.7  196.907698  27.681997  0.00129881160179   1.8949663   15.316401   355.05869   82.768021        2.206    0.000
 2026-Aug-31 09:00  m  21 43 20.57 -27 14 13.6  210.685556  22.812212  0.00134501137495   1.9434049   16.807898   4.4738146   81.995987        2.235    0.000
 2026-Aug-31 10:00  m  21 43 34.54 -26 56 57.5  222.541100  15.526397  0.00139226812007   1.9818924   18.381895   15.746904   81.128214        2.286    0.000
 2026-Aug-31 11:00  m  21 44 06.55 -26 39 03.9  232.521151   6.492522  0.00144028062444   2.0054916   20.282995   27.336401   80.013894        2.384    0.000
 2026-Aug-31 12:00 Am  21 44 58.52 -26 21 09.4  240.993047  -3.742711  0.00148864386047   2.0105520   22.533345   38.064951   78.598034         n.a.     n.a.
$$EOE
*************************************************************************************************************************************************************
I looked up the coordinates for 0600-0700 UTC (2300-2400 PDT) in Stellarium. RST would be in a fairly blank section of sky in Piscis Austrinus. Stellarium showed a star HD 206612 close to where RST should be, so I intended to make that the center point of the images I took. Later I would learn that the ZWO ASIAIR does not have a database of HD numbered stars (nor TYC or HIP numbers) so I ended up eyeballing the star I wanted to center by comparing ASIAIR preview shots to Stellarium charts.
Stellarium by default provides the coordinates of objects based on the mean equinox and ecliptic of date, not J2000 or ICRS (which are essentially the same for this use). If you swipe left on an object's details you can see J2000 coordinates. Stellarium also has an option to turn on a J2000 grid. The difference is small (about 1/3 degree today) but important for detailed work. It is roughly the difference between RST and the rocket body above.
The summit of Mount Laguna was quite windy that night, so I moved down to a slightly lower observing
point that was better sheltered from the wind. I set up the tripod low and close to the side of
my car to get some additional wind protection. It took about an hour to get fully set up. I
took 38 one-minute shots over 76 total minutes, and then took calibration frames (darks, bias,
and flats) before returning home. There was an 82% moon about 70 degrees away, but the night
was otherwise clear.
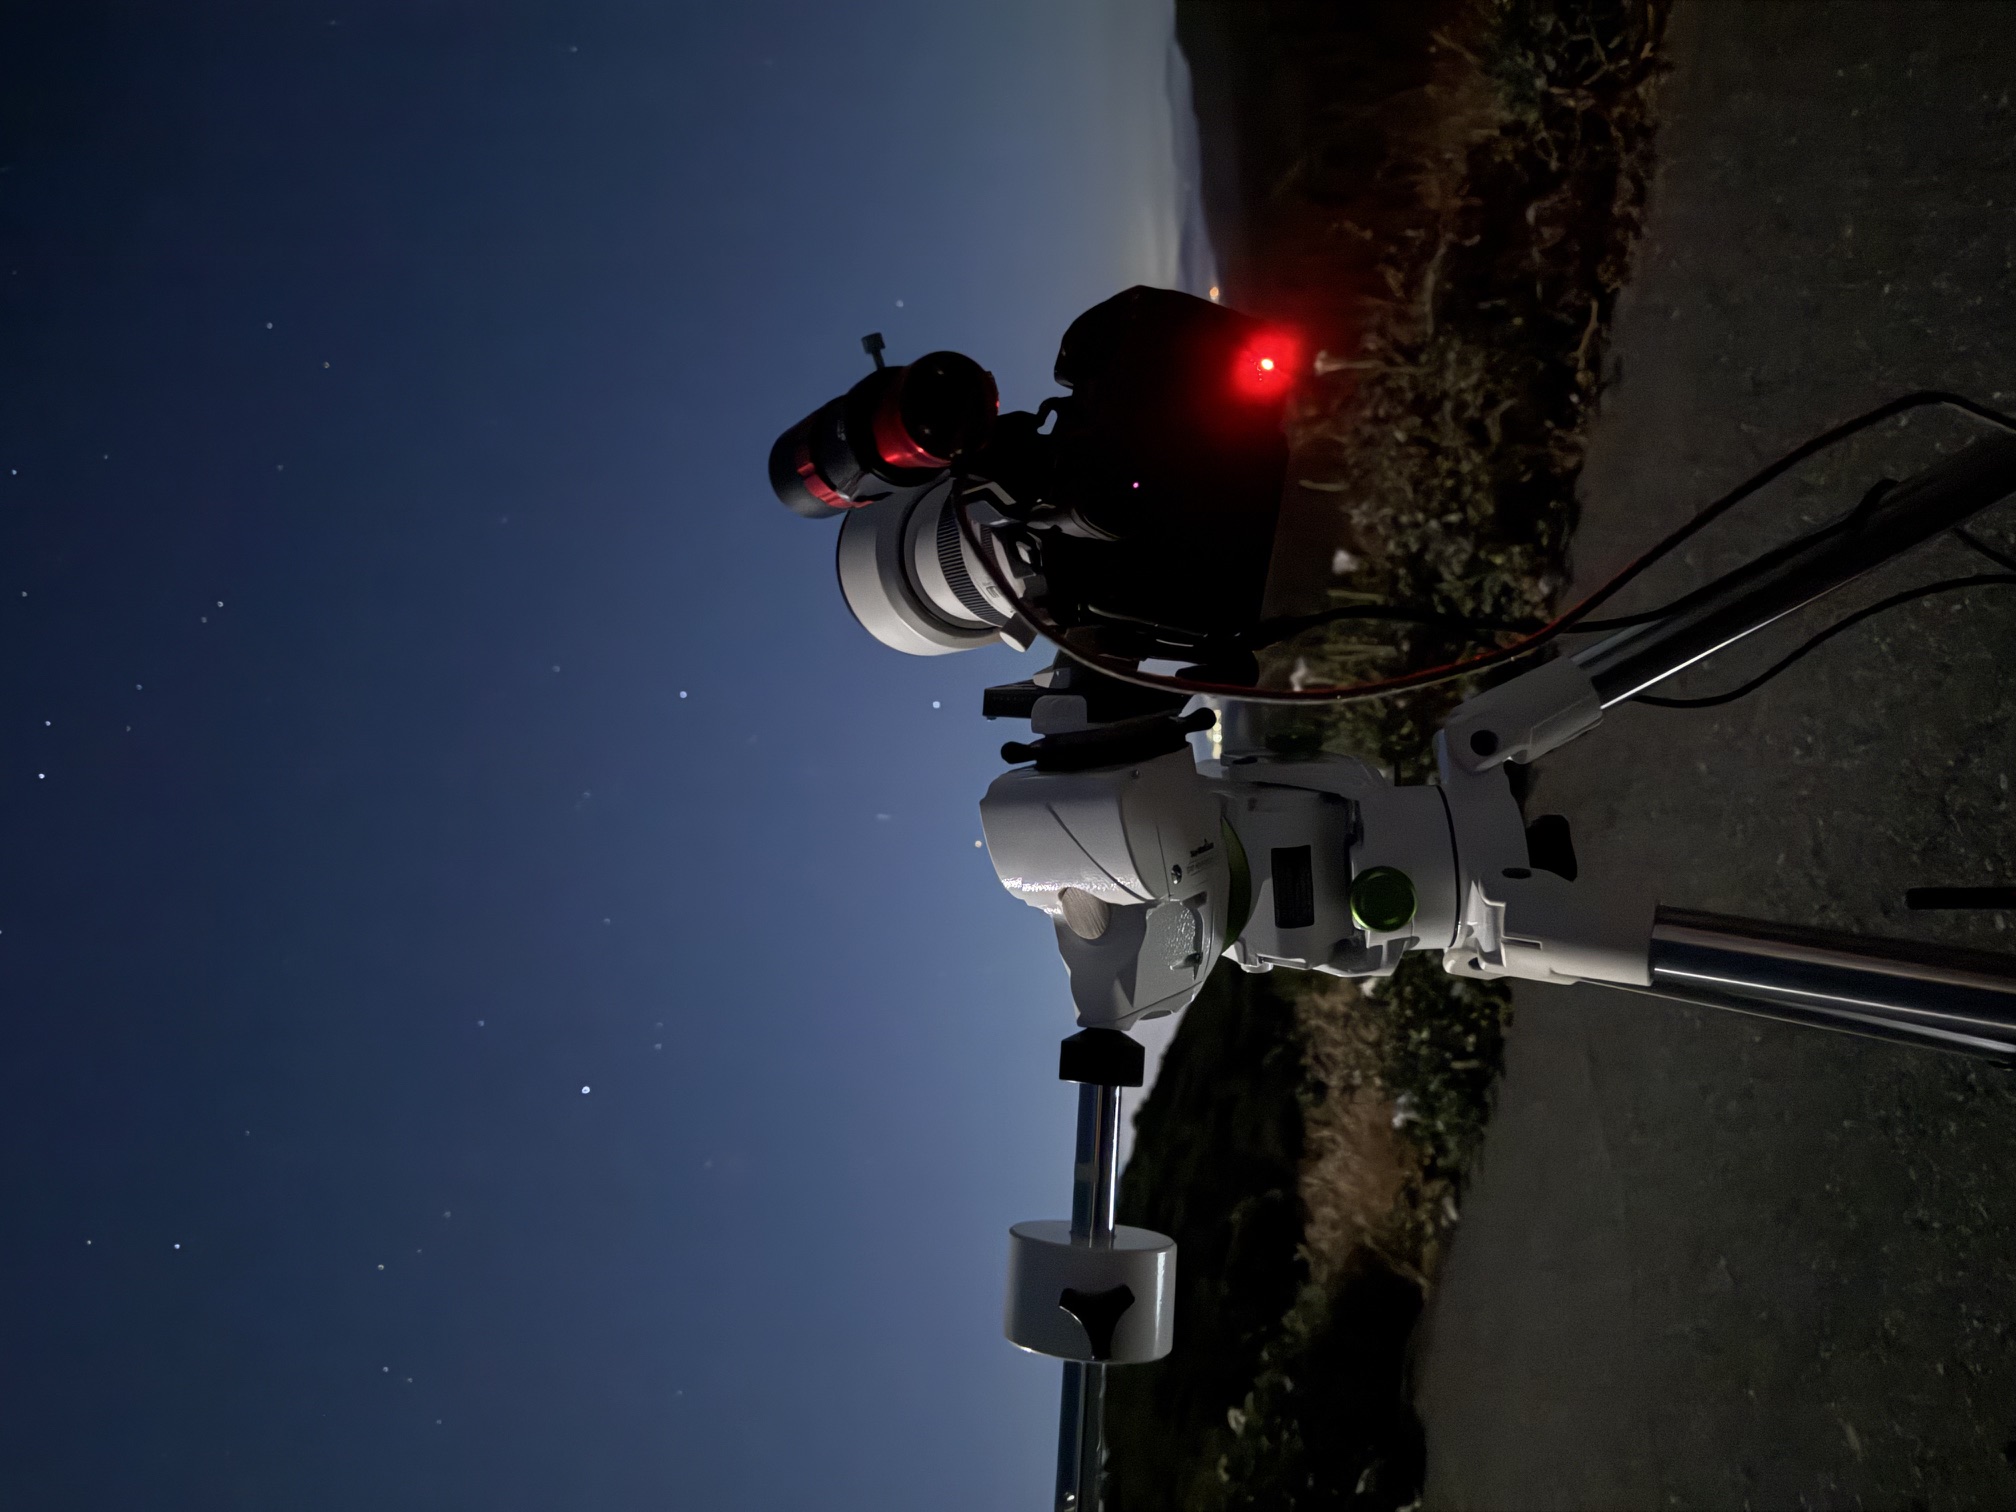
The equipment I used was a Canon R5 "mirrorless" DSLM with a 200mm f/2.8 lens. It was mounted on a SkyWatcher Star Adventurer GTi. I attached a guide scope to the camera hot shoe and connected the mount, camera, and guide scope to an ASIAIR Mini. I ended up taking 60 second shots at ISO 800 which comfortably avoided blowing out any of the stars in the field of view, and was not so long that RST would leave a significant streak in each shot. Sky_motion in the Horizons output shows RST moving about 12 arcseconds/minute. The Canon R5 has 4.40 micron pixels which at 200mm gives an image scale of 4.54 arcseconds/pixel (206.265 * 4.40 microns / 200 mm), so in one minute RST would move about three pixels. I had the ASIAIR dither between each shot, i.e. move the telescope slightly so that stars would not land on the same pixels every time. Downloading the images after each shot, dithering, and waiting for the mount to settle, added up to about 60 seconds of elapsed time between each shot. This causes the dashed lines you see in the composite.
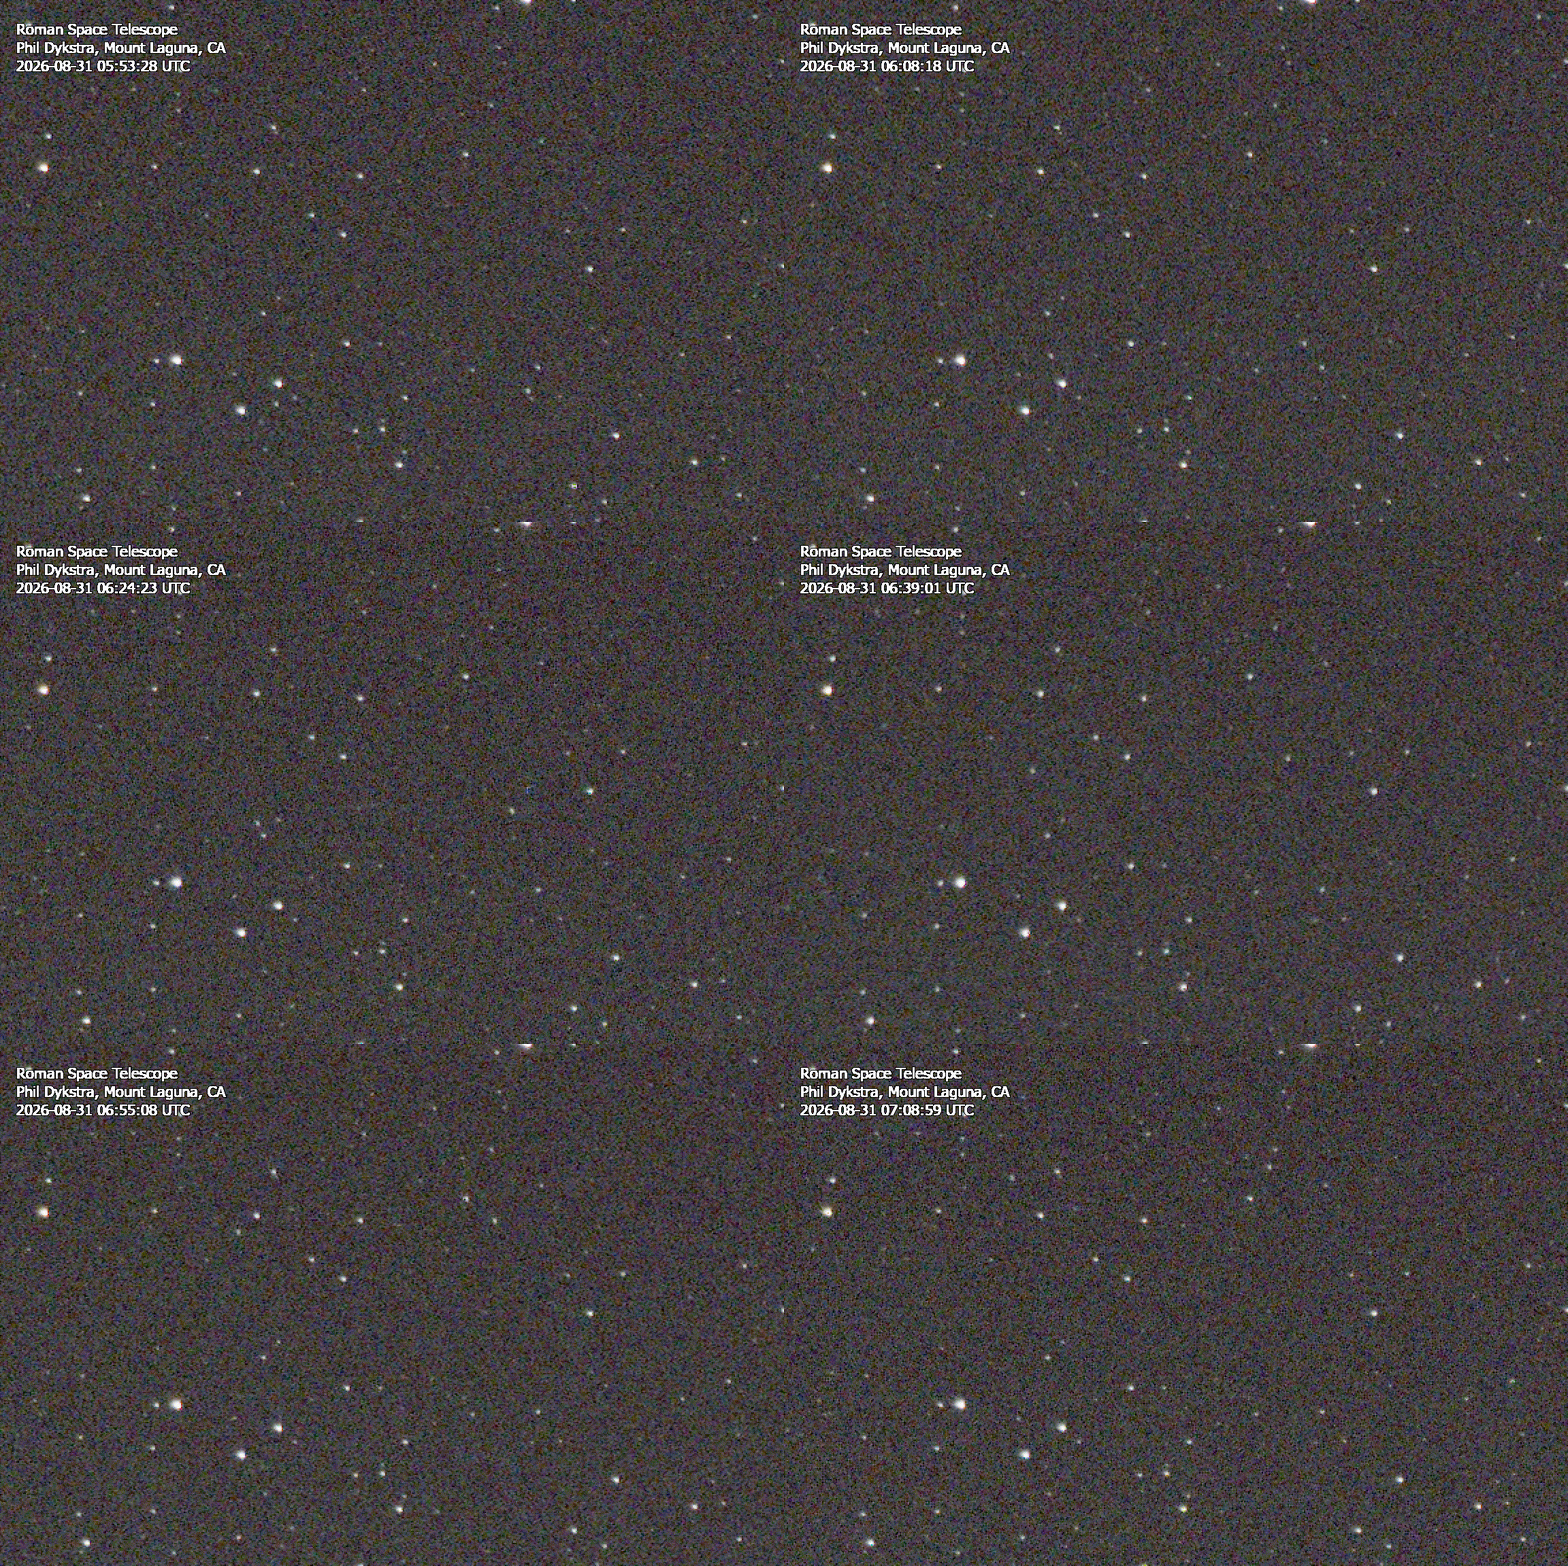
I processed the images in PixInsight. I started with WeightedBatchPreProcessing (WBPP) which calibrates, debayers, registers, and normalizes each shot. I found that when making a movie, it is best to include the Local Normalization step in WBPP. The sky background got darker over the course of the hour as the target elevation increased. Local Normalization corrected for that as well as subtle frame-to-frame variations which resulted in a less distracting video. I selected one (c_d_r_n) reference frame near the middle of the sequence and PlateSolved it. I then used SpectroPhotometricColorCalibration (SPCC) with Background Neutralization enabled to find a single set of color calibration values to apply to every image.
* White balance factors:
W_R : 0.9351
W_G : 0.6867
W_B : 1.0000

* Background reference:
B_R : 0.00641728
B_G : 0.01159516
B_B : 0.01204605
I tried to apply these to each frame using PixelMath and discovered an undocumented behavior of SPCC. If you select Background Neutralization in SPCC, it rescales the image after applying the above corrections. Experimentation showed that it appears to scale the lowest pixel value in the image (from any channel) to 0.001, and the maximum pixel value (from any channel) to 0.99. The lower end scaling is similar to what the separate BackgroundNeutralization tool in PixInsight does when set to "Target Background" mode at 0.001. The default behavior of the BackgroundNeutralization tool shifts the "Background reference" values to zero, which places half of the background noise below zero. That is probably not what you want, which is why SPCC rescales. A movie where half of the noise is clipped to zero does not look good, so I added a fixed offset to the PixelMath equations to keep the noise above zero while still color correcting.
R: $T*0.9351-0.00641728+0.02
G: $T*0.6867-0.01159516+0.02
B: $T*1.0000-0.01204605+0.02
Juan Conejero states that drizzle integration should always be used with One Shot Color (OSC) cameras to get the best results from SPCC color calibration. He notes that VNG Debayering can leave color artifacts that bias SPCC. But you certainly can't drizzle integrate single frames of a movie. WBPP gives you no control over the default VNG Debayer algorithm (something for the wish list) so a perfectionist might want to perform the WBPP steps manually and perhaps select bilinear interpolation as the Debayer step to end up with more accurate color corrections from SPCC.
After color calibration I applied a 576x384 crop around the area of interest using DynamicCrop and upscaled the images 2x using IntegerResample to better fit typical display screens. This cut the pixel scale in half in the final images. The specific crop dimensions were chosen to be a combination of powers of two, and to preserve the 3:2 photo aspect ratio.
I did not apply anything like NoiseXTerminator (noise reduction) or BlurXTerminator (deconvolution or sharpening) to the individual shots that went into the movie. I experimented with those options quite a bit but found that the natural noise variation from frame to frame resulted in very annoying artifacts in a movie if those tools were applied. Dim stars for example might flicker in and out of existence. If your noise floor is very low, and the signal you are trying to see is well above it, then you might be able to push most of those artifacts to black. But my signal was close to a sizable noise floor (from an uncooled camera), so the data here is calibrated, upscaled, and stretched but otherwise unprocessed.
The composite picture at the start of this article is from an ImageIntegration of the 38 fully calibrated frames with the Combination mode set to Maximum. This is a good way to see any moving objects in a set of subs such as meteors, asteroids, or satellites. The movie was made with ffmpeg from PNG frames exported by the PixInsight Blink tool. Mid-exposure timestamps were added to each frame using a custom JavaScript tool for PixInsight that Claude AI was nice enough to write for me.
ffmpeg -framerate 10 -i Blink%05d.png -c:v libx264 -pix_fmt yuv420p -movflags +faststart RST.mp4
ffmpeg -framerate 10 -loop 0 -i Blink%05d.png RST.gif
Comments/questions to phil@pdykstra.com